- Home
- C Tutorial
- C Hello World
C Hello World
It is time to create your C hello world program. By tradition, a "Hello, world!" program just prints that greeting on the screen. This is usually the first program that any developer creates. It serves two purposes:
- Runs the simplest possible program to see if your environment is working correctly.
- Shows a very basic program that we use to explain the basic structure of a program
In this lesson, I will show you how to create your first program for each of the environments from the previous lesson. You will pick and create the program for the IDE that you chose. To create a program you will:
- Create a new project
- Add a source file
- Write the code
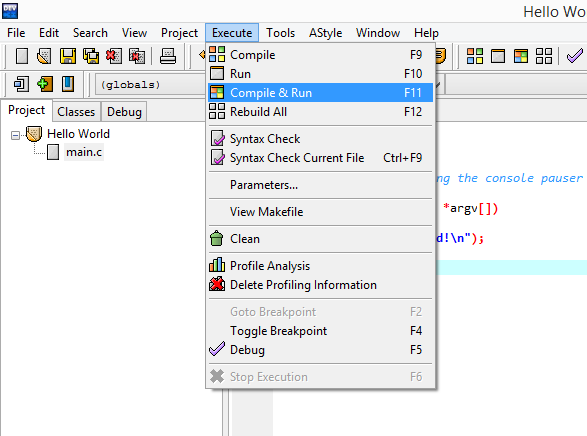
- Compile
- Run
C "Hello, world!"
No matter which environment you use, the code for this example is the same:
1 2 3 4 5 6 7 | #include <stdio.h> int main() { printf("Hello world!\n"); return 0; } |
I will show you how to write compile and run the code in the IDEs that we looked at in the last lesson:
Visual Studio
I am using Visual Studio Community 2015, but the process is very similar to previous versions(both Express and Professional editions). Every program in Visual Studio is created within a project. To create your C hello world program, create a new project:
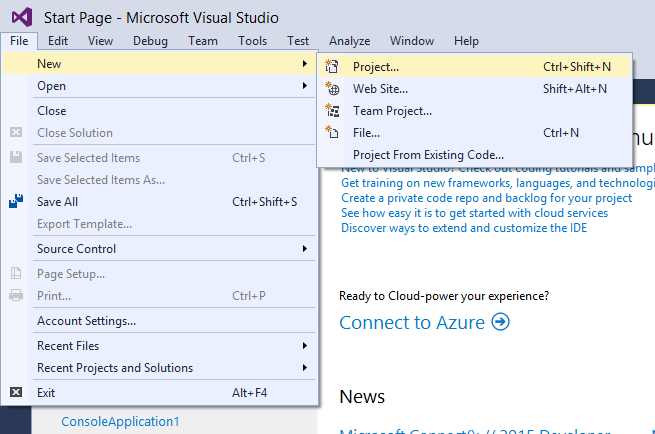
1. Open Visual Studio and go to File->New->Project
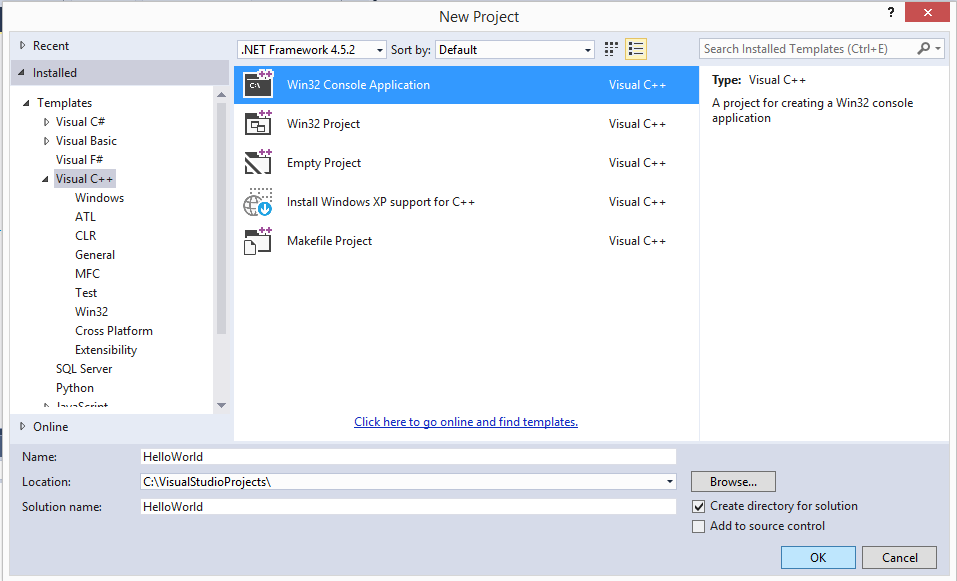
- Choose a project template. In VS, the project template for C and C++ is the same. Select Visual C++.
- From the templates on the right, select “Win32 Console Application”.
- Before clicking “OK”, give a name to the project and choose a directory for it. Do this in the fields below the templates.
- Click “OK”, when you are done.
If this is a new installation, it is possible that the template component is not installed yet. If that is the case, double click on the “Install Visual C++” text to add the component.
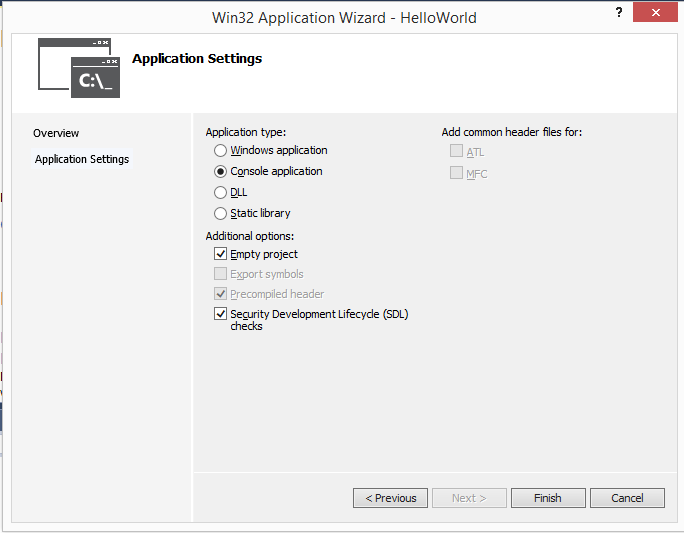
- Click “Next” in the first window of the Win32 Application Wizard.
- In the second window, check the box that says “Empty project”. If you don't check it, by default additional stuff will be generated that you don't need now.
- Click “Finish”.
You have just created a new empty project. You can see its contents in the “Solution Explorer”. The solution explorer is located to the right, by default. To make it your C hello world project:
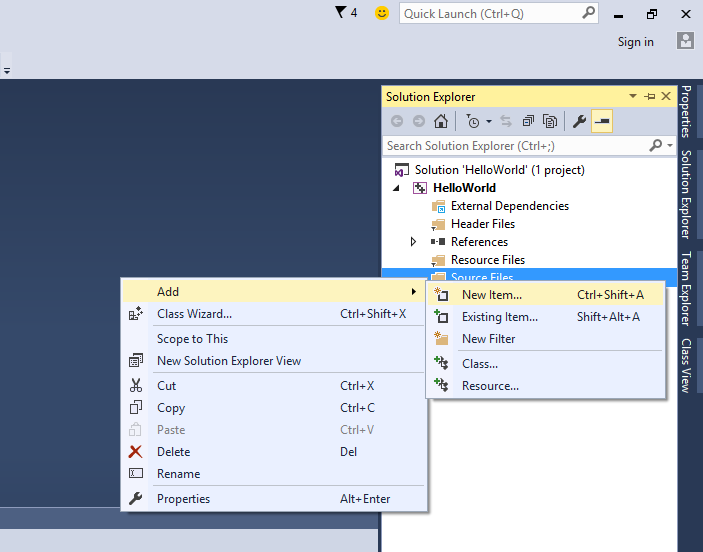
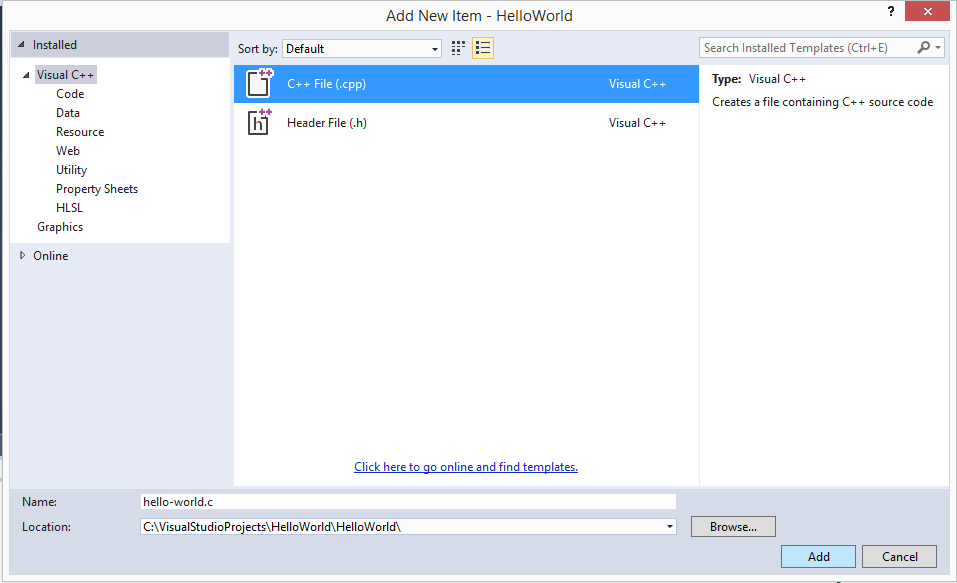
- In Solution Explorer, right click the folder “Source Files”
- choose Add->New Item
- Choose a “C++ File” template
- give it a name
- change the file extension to “.c”. This way, Visual Studio knows to compile the code in that file as a C and not C++ code.
- Click “Add”.
- In that new source file, rewrite (or copy-paste) the example code from above.
Now you are ready to run your C Hello World program!
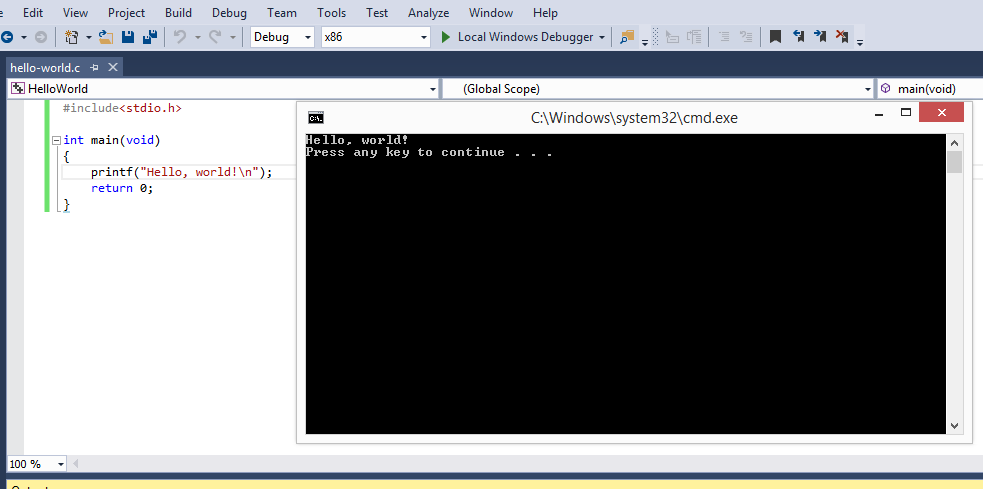
- Press CTRL+F5 or go to menu Debug->Start Without Debugging.
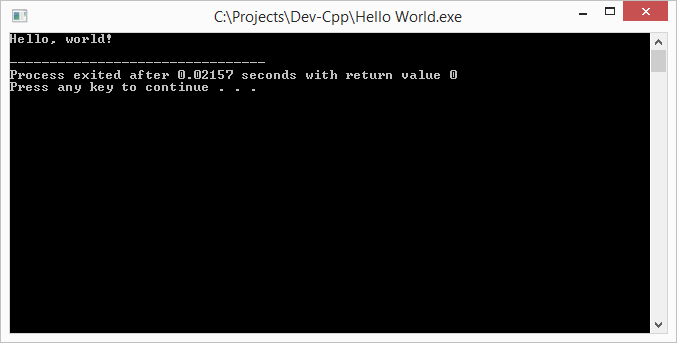
The result looks like this:
Code::Blocks
To compile and run code you need a compiler. Make sure you have the Code::Blocks distribution that includes the GCC, otherwise you need to install a compiler manually.
Code::Blocks allows you to create a program in several ways.
-
The simplest way is to create a new empty file. Then write the code
and save it as .c file.
- Menu File->New->Empty File.
- Then write the code
- File->”Save as” and save it as a C source file.
This method is the fastest to do, but you will not have code help(coloring, suggestions) before you save the file as a C source file. -
The second way is to create the file as C source file right from the
beginning.
- File->”New File...”
- Choose C/C++ Source and complete the wizard. - The last method is to create a project and then add the necessary source and header files inside. I will show you this method in pictures and details.
The first two methods are convenient only if your program consists of just 1-2-3 files. If your program has more files it is preferred to put them in a project, because it is easier to navigate.
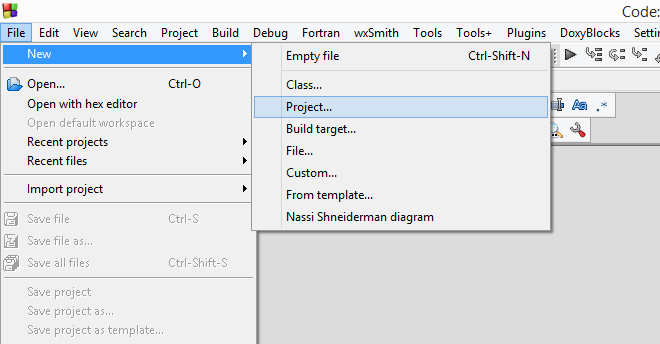
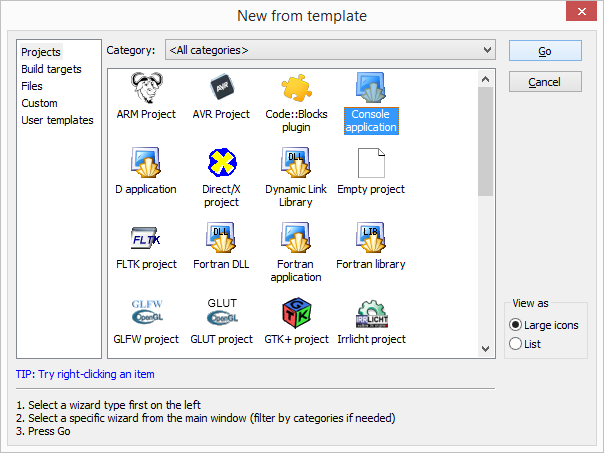
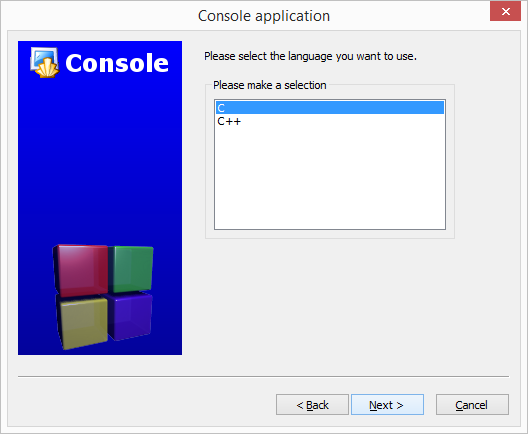
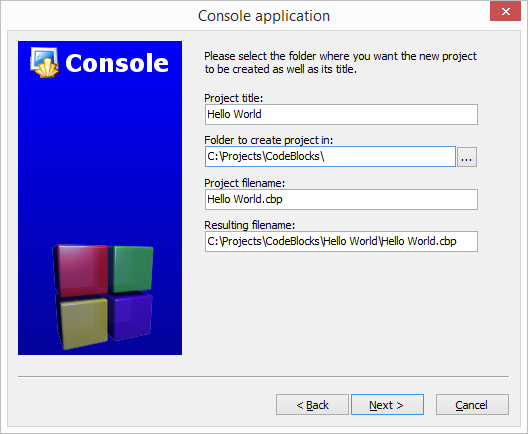
With the C hello world we want to know that everything is working as expected, so let's create your first project! Start Code::Blocks and from nemu File create a new porject:
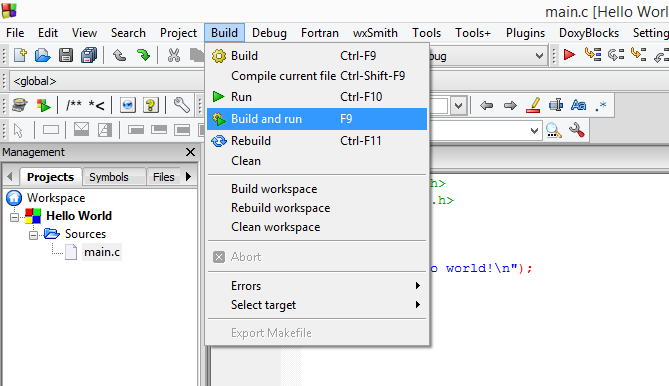
Now in the left side of the screen go to Projects in the "Management" sub-window. Expand your new project and its folder "Sources". You will see that Code::Blocks automatically added a new source file "main.c". Double click it, to open it.
You see? The "hello-world" code is already there ;)
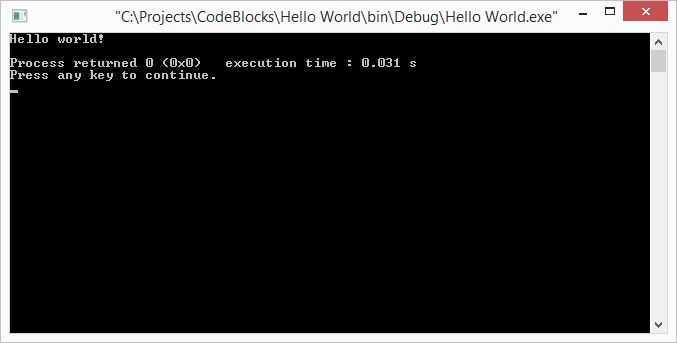
It is time to compile and run your first C program. Go to menu Build->"Build and Run" or just press F9 and then OK, when you are asked if you want to build the project.
Dev-C++
If you downloaded a distribution without a compiler, you need to install one manually.
There are two ways to create our “C hello world” program in Dev-C++:
- Directly create a new source file from File → New → Source File
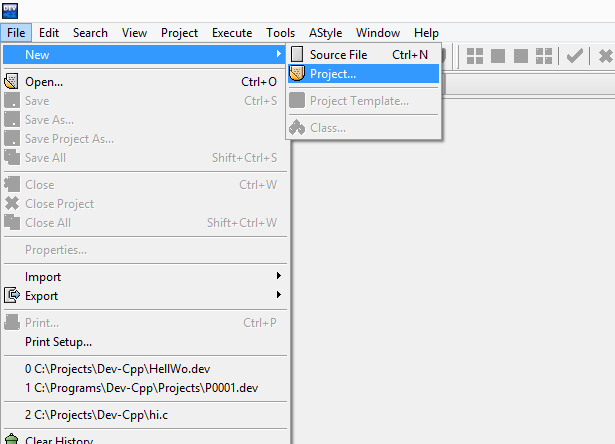
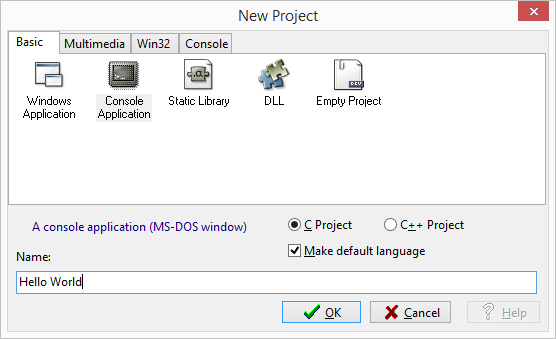
- Create a new project and edit its source.
For a this short program it is easier to choose the first option. However, later for programs with more files it is better to use a project. Here is how to create a C project in Dev Cpp:
In the next window just click "Save" to save the project files in the default location.
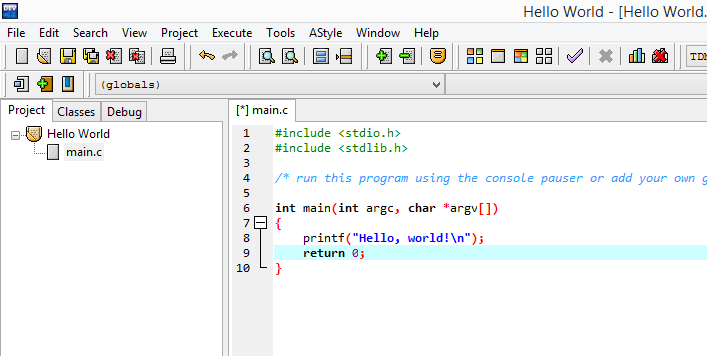
Now your project is created and it contains one source file:
Geany
Install a compiler (GCC in this case)
Before you can compile and run your C hello world, you need to install a C compiler. For instance to install the GCC in any Debian based distribution, for instance Ubuntu, do the following:
- sudo apt-get update
- sudo apt-get install build-essential
Create the C Hello World program
In Geany you can:
- create a new file and save it as .c or..
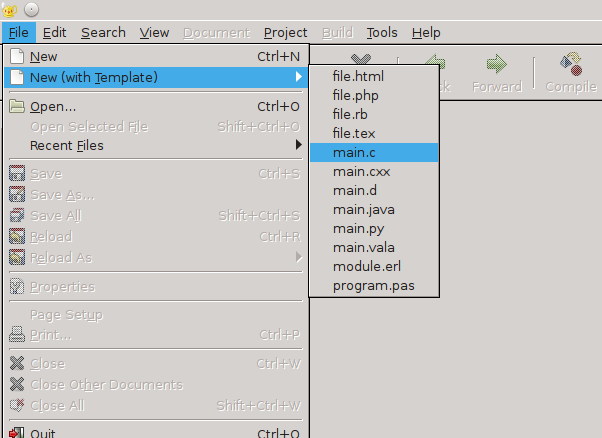
- create a new C file from template.
I will show you the second option:
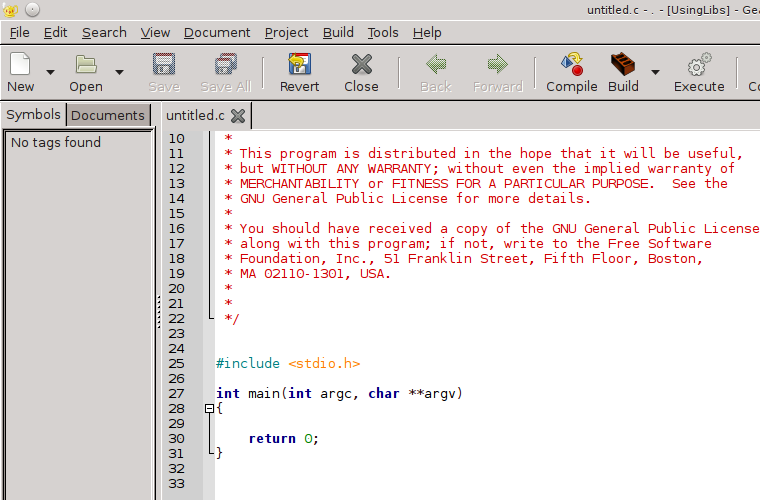
This will generate a new C source file. It will start with a 20 row comment(the red text starting with /* and ending with */) that you can delete right away.
Add the line
printf("Hello, world!\n");
between the opening curly bracket "{" and the line "return 0;".
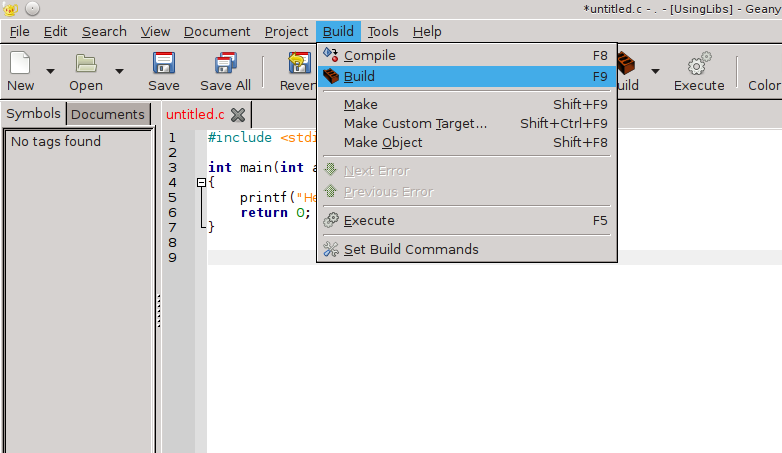
Now you just need to build and execute the file:
When the build is done, you will see the message "Compilation finished successfully." in the Compiler section below the code.
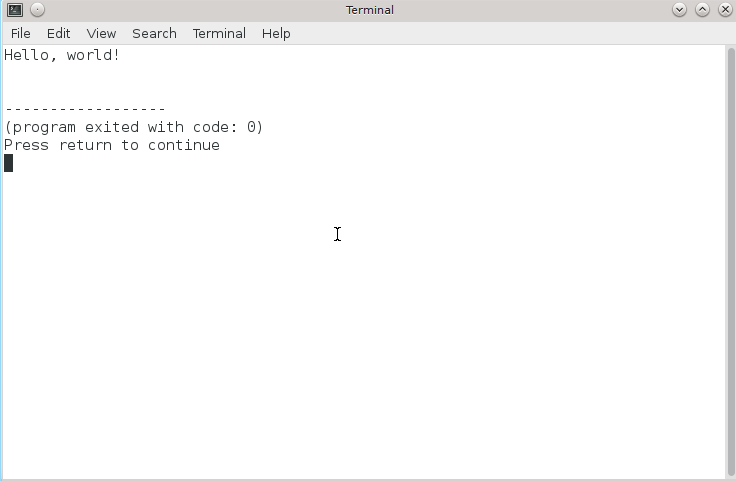
Now press F5 or the "Execute" button to start the program. You will see a console that displays the "Hello, world!" string.
You have just created your C Hello World program! Your development environment is working and tested, so you are ready to continue with the actual part of the basic C tutorial.
In the next lesson you will see what is the typical structure of a C program. To explain it, I will use the example from this lesson.
|
Previous lesson: C programming software |
Next lesson: C Language Program |
- Home
- C Tutorial
- C Hello World
 Manage the football team of your city and make them champions!
 Manage the football team of your city and make them champions!

 Manage the football team of your city and make them champions!